Painting your home is a big project, but it’s even more challenging if you have a mildew problem to take care of beforehand. Unfortunately, painting won’t solve your mildew problem, and if you don’t prepare your home appropriately before painting, it can damage your walls, ruin your paint job, and make the whole process much more challenging.
Sometimes, you may not realize you have a mildew problem until Boynton Beach painters arrive and tell you. Mildew can look like smudged dirt, which can make it challenging to identify. To ensure your paint project goes smoothly even after discovering mildew, here are some things to keep in mind.
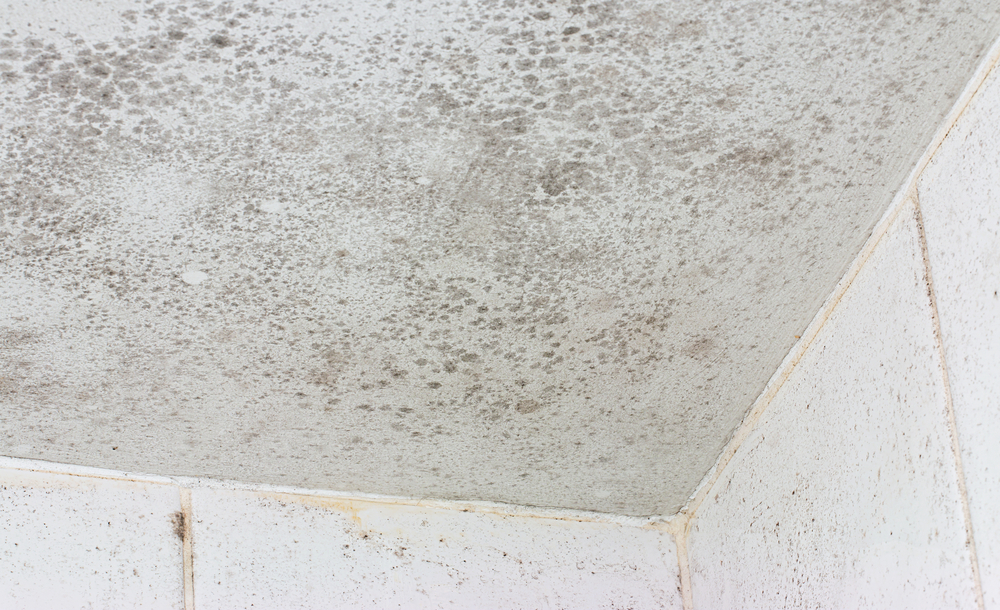
How Do Mold and Mildew Differ? How Do I Know Which One I Have?
The words mold and mildew are often used interchangeably, but they are not the same. Mildew is less harmful and safer than mold typically is. Both are caused by moisture, though mildew may also be caused by low-quality paint. In some cases, mildew may be caused by not priming the painting surface or simply painting over previous mildew problems without taking care to remove the mildew first.
If you aren’t sure whether you have mildew or just dirt, take some household safe bleach and apply it to the area. While mildew will either become light or disappear, dirt won’t change in any way. Fortunately, mildew can be removed and doesn’t damage the paint.
Can I Paint Over Mildew?
While you can technically paint over mildew, it’s not advised. Painting over the problem won’t remove it. Instead, you’ll just have the same problem reappear shortly after your new paint job, and removing it could remove the fresh paint.
Painting over mildew is also unsafe for the painter. Although mildew is less toxic than mold, it can still cause health problems. So for the safety of both your family and the painter, it’s best to remove mildew before you paint.
How Can I Remove Mildew?
First, gather the necessary supplies: protective gear, household safe bleach, and a sponge to remove mildew. Mix one part bleach to three parts water and apply the solution over the problem area using the sponge. Don’t forget to wear protective gloves and eyeglasses.
Let the solution sit for at least thirty minutes. After that, rinse it off with water and allow it to dry. Make sure that you don’t use another cleaning solution that contains ammonia, as ammonia and chlorine create toxic gases when used together.
Before you apply the solution, make sure to test a small area. Let the solution sit for a while, then check to see how your wall reacted. While it’s unlikely that there will be a problem, some materials (such as aluminum, plastic, and enamel) may be damaged by the bleach solution, so it’s always best to test a small area before applying the solution to your wall.
How Can I Prevent Mildew From Returning After I Paint?
If you’ve taken the time to remove mildew before painting, then you’re already one step ahead. There are, of course, some more steps you can take to reduce the chances of mildew returning and ruining your fresh paint.
When choosing your paint, make sure to pick a high-quality option. There are some paints that are mildew resistant, such as paint that uses zinc oxide. Use paints that include mildew protection, as this can help prevent future problems.
Some paint types are simply more vulnerable to mildew. Paints with linseed oil are especially at risk, so steer clear of these paints when possible. Low-quality paint is also more likely to experience mildew problems.
Ensuring that the area gets good airflow will help reduce the chances of mildew growing back. Mildew grows in warm, damp areas, so you may want to install a fan in the room or leave the door open, so mildew is less likely to grow.
Conclusion
Mildew is a common problem, but you can take steps to tackle the issue. It’s important that you remove it before you paint your home, though, or it will just return and continue causing problems.